 Hi all! Hope you had a great weekend!
Shaythecoach here, writing another blog post. This one covers a really neat way to stretch, releasing tight muscles! There is a SURPRIZE RECIPE at the end too! Most of my facebook followers will be very happy that I included this one because they’ve been asking for it 🙂
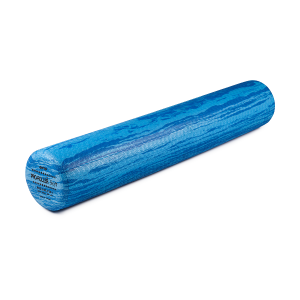
The Therapeutic Benefits of Foam Rolling
Foam rolling is also known as SMR (Self Myofascial Release) and is based on a hands-on technique that has been used for years by therapists. To achieve release, therapists would apply a low load, long duration, dragging force across layers of soft tissue of their respective clients. In most cases, it would be 90-120 seconds and occur throughout different mechanisms in the body. This would allow the body to release the tissue and mobility between the sliding surfaces, thus causing a restorative effect. The foam roller can be used in the same manner, allowing oneself to create similar myofascial release!
One scenario where it would be appropriate to use this method of foam rolling is for clients who have desk jobs. These clients are used to being seated day in and out for weeks, even years at a time! The compressed areas from sitting will grow little fibers around them that are very similar to scar tissue. High risk areas are the hip flexors, hamstrings, and glutes. Many times, an individual could feel stiff after sitting for hours or even after sleeping all night. This happens as a result of the fibers that have laid down from the inactivity. These fibers can be worked on and released through foam rolling.
Foam rolling can be done on adductors, hip flexors, glutes, tensor fascia latae muscle, calves, and upper back. You would begin by identifying which area(s) needs to be rolled. This can be done simply by checking in with your body and familiarizing yourself as to where there is muscle tightness or compression. If there is concern of risking injury, one can obtain a more technical evaluation utilizing a fitness professional or therapist to do an overhead squat assessment. In an overhead squat assessment, a professional would look for the following: feet relatively straight ahead, knees in line with second or third toe, hips neutral, arms extended overhead with no additional body part compensating for this posture.
If the feet turn out, roll out the calves. If the knees cave in, roll the adductors, If the pelvis dips forward, roll the hip flexors. If the arms drop, roll the upper back. Once the muscle is identified based on self evaluation or professional assessment, roll through the muscle by applying body weight compression onto the roller for about one inch per second. Do this until a tender spot is found and you feel pain rating 6 to 8 on a pain scale of 1 to 10 (10 being most painful). Hold the pressure on the pain point for 20-30 seconds, until the pain begins to subside. Then move onto the next pain point. To maximize results, you can roll daily and follow with static stretching.

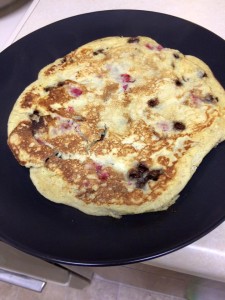
Here is a dairy free, gluten free, soy free, grain free recipe for pancakes!
Try this recipe:
Prep Time:10 minutes
Cook Time:10 minutes
Yield: 2 Servings
Ingredients:
- 1/4 cup coconut flour (for thicker pancakes) OR
- 1/4 cup almond flour (for thinner pancakes)
- 1/4 cup flaxseed meal flour
- 1/8 tsp baking soda
- Pinch of salt
- 1/3 – 1/4 cup almond milk
- 2 tbsp organic, cold-pressed coconut oil
- 3 eggs
- 1 tbsp honey
- 1/2 tsp vanilla extract
- Mix the eggs, coconut oil, and honey.
- Add the vanilla extract and almond milk.
- Put in the coconut flour, baking soda, and salt. Mix!
- Put a dab of coconut oil in your skillet and then using a measuring cup, add a little batter to the pan. This recipe should make about 8 pancakes.
- Be careful to check the underside of the pancake before flipping because they are likely to not bubble since they are made with coconut flour!
- Flip until the batter is fully cooked.
- Serve and eat!
Once you’ve made these and have the basics down, you can get creative!
You can expand on the basic recipe by adding the following to the batter: blueberries, strawberries, blackberries, even walnuts! Again be creatively healthy!
Shay Vasudeva is the owner and founder of URBANMONK, a company that helps people become the best version of SELF. She is a Certified Personal Fitness Trainer, Certified Nutritional Therapist, and Black Belt Karate Instructor. For more information you can go to: www.urbanmonk.biz or follow on facebook at www.facebook.com/urbanmonkaz.
This blog is intended for those who are interested in nutrition, fitness, karate, tai chi, or simply becoming best version of SELF on a business professional level. Thank you!
We are not doctors/medical professionals and don’t diagnose or treat diseases. The contents of the blog are for education purposes.

Very informative post. I learned a lot from this one. I did not know you could use a foam roller like this. Plus love the recipe. Thanks for sharing!!!
Enjoyed examining this, very good stuff, thanks.
Thank you!
I have not checked in here for a while since I thought it was getting boring,
but the last few posts are good quality so I guess I’ll add you back to my daily bloglist.
You deserve it friend 🙂
Thank you for the honest feedback. Sometime priorities shift like during the school year, I am teaching more classes…I try to keep things fresh and interesting but can slow down on new content from time to time.
Are there any topics you’re interested in reading about? Let me know and I’ll see what research I can find and write about it so long as it’s fitting and appropriate!
In health,
Shaythecoach
This website is amazing. I will tell about it to my friends and anybody that could be interested in this subject. Great work guys!
Thank you!